Article verified for Release 15.1 on September 20, 2025.
Roles and permissions control how users interact with the system. Permission is the authorization to perform specific actions or access certain data within a system. A user role is a predefined or custom collection of permissions that defines what a user can access and do within the system. Together, they ensure secure and flexible management of user access.
Default Roles
Predefined roles in the system are:
- Administrator -A role with all permissions in the system that can fully access and manage all application modules.
- Instructor – A role with higher-level permissions than a regular user. Instructors can manage groups, question pools, tests, and reports assigned to them, while only previewing the content not managed by them.
- Proctor – Proctors can monitor candidate progress on tests and supervise them in real-time.
- Student – A basic user who can take assigned tests, surveys, training courses, and view/print personal certificates.
- Guest- Provides temporary access for non-registered users to take tests and surveys, with no user data stored or actions recorded.

Non-editable Default Roles
The two default roles, Administrator and Guest, cannot be edited or deleted. This means you can only assign users to these roles; you cannot modify what they can access or how they function.
All other default roles (Instructor, Proctor, Student) are editable, allowing you to adjust their permissions if needed.

Custom Roles
In addition to the predefined options, you can edit the adjustable ones or create an unlimited number of custom roles. Custom roles let you define unique permission sets, landing pages, or registration rules that the default ones may not cover. 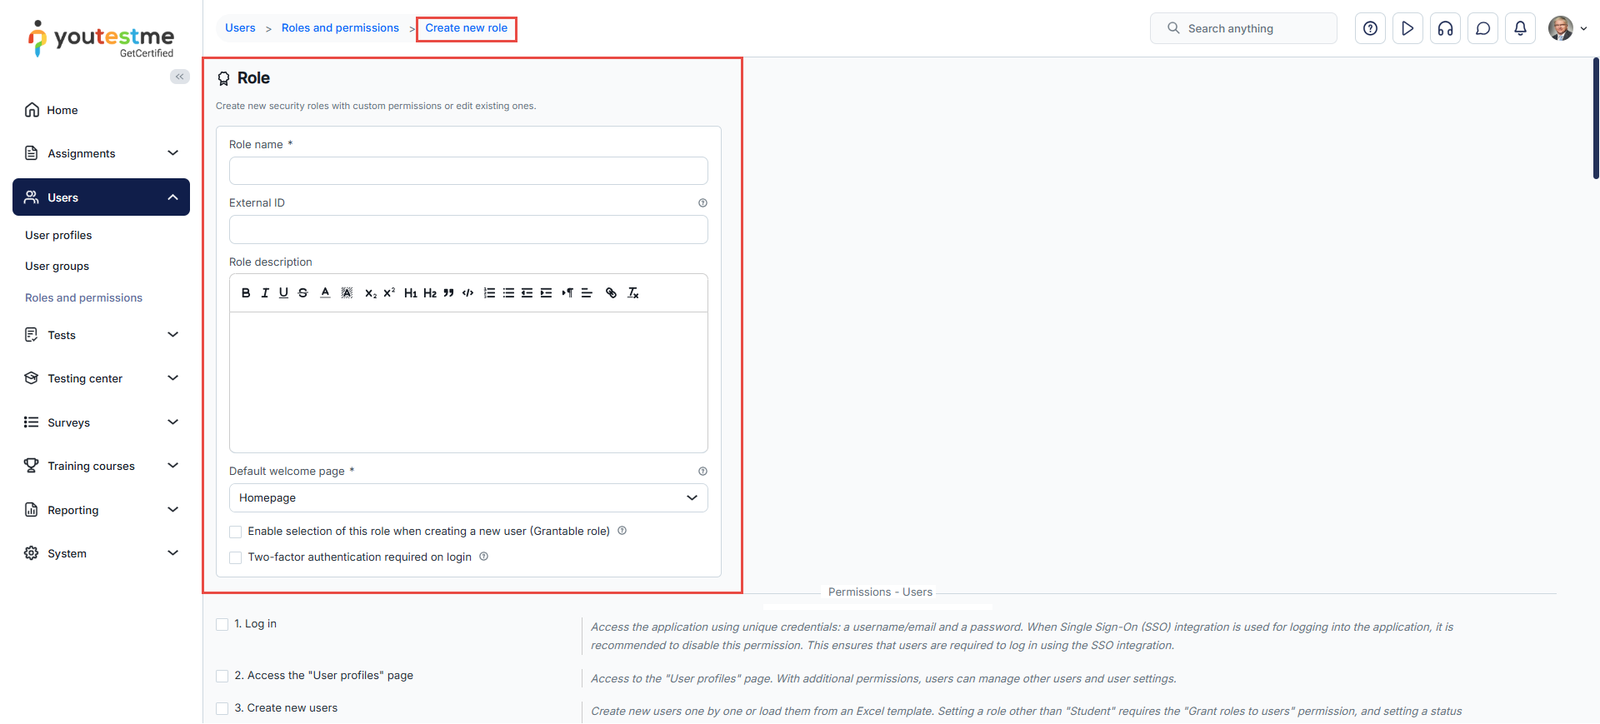
This flexibility allows you to rely on system defaults, tailor existing roles, or build new ones from scratch. A single user can also hold different roles across multiple workspaces. For more details on workspace roles, please visit this article.
Managing Roles
From the Roles and Permissions tab under Users, you can:
- Create a new role
- Copy a role
- Edit a role
- Delete a role

Role Settings
When creating or editing a role, the following settings are available:
- Role Name – The displayed name of the role.
- Role Code – A unique, system-generated code that cannot be edited and is required when importing users via an Excel template.
- External ID – An optional identifier for integrating with external systems.
- Role Description – A short text displayed in the welcome message on the user’s home page.
- Landing Page – Defines the first page a user with this role sees after logging in.
- User Registration Link – Generate and share a link that allows new users to register directly under this role.
- Grantable Role –If a user has permission to create a new user (12. Create new users – enabled) but no permission to assign roles (3. Grant roles to users – disabled), they can select any role labeled as a Grantable role when creating a new user.
- Two-Factor Authentication – Require users assigned to this role to complete two-factor authentication upon login. If two-factor authentication has not been set up, users will be prompted to configure it before proceeding. Please note that this option is applicable only when a standard login with credentials is used. For more information on how to configure two-factor authentication, please refer to this article.
- Permissions – Select specific actions and data this role can access within the system.
- Click the Create/Update button.

Note: Editing an existing system role follows the same process as creating a new one.