Article verified for Release 15.0 on September 19, 2025.
This article explains how to create a Stripe account, integrate it with the YTM application, set prices, and review payment reports.
Creating a Stripe account
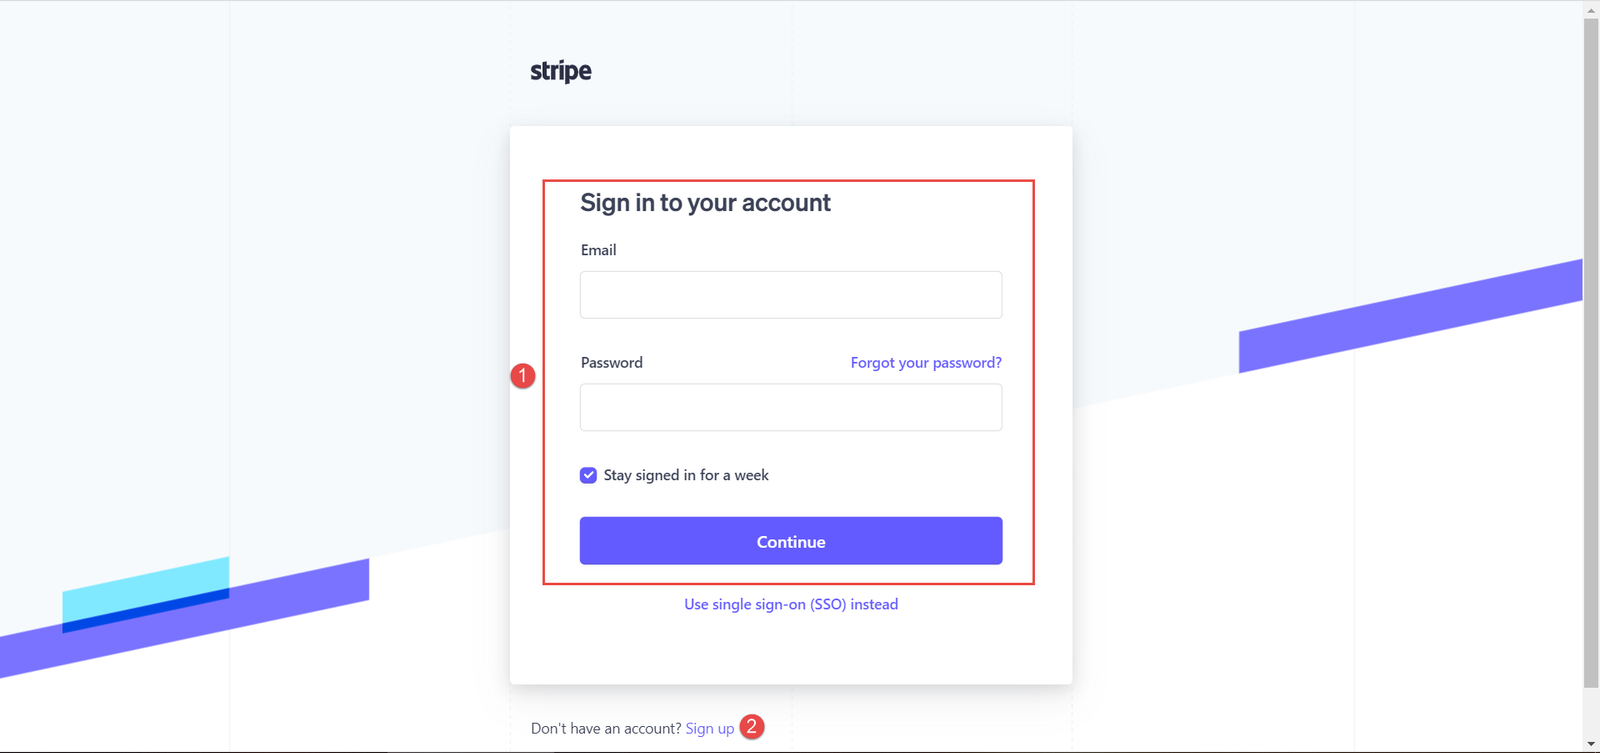
To create a Stripe account, visit www.stripe.com, then click the Sign in button in the top right corner.

Then, you can:
1. Log in to the existing Stripe account or
2. Create a new account by clicking the Sign up option.
To create a new Stripe account:
- Enter the email address.
- Enter the full name.
- Enter the password for the Stripe account.
- Click the Create account button.

Once you create the account, to access and copy the account ID, you should:
- Navigate to your profile.

- At the bottom of the page, you can see your ID. You should select it and copy it.

Navigate to the Developers tab and choose API keys. On that tab, you will see Publishable and Secret keys. Click the Reveal test key button to display the secret key. Those keys will be used to connect your Stripe account with the GetCertified application.

Setting up E-commerce Integration
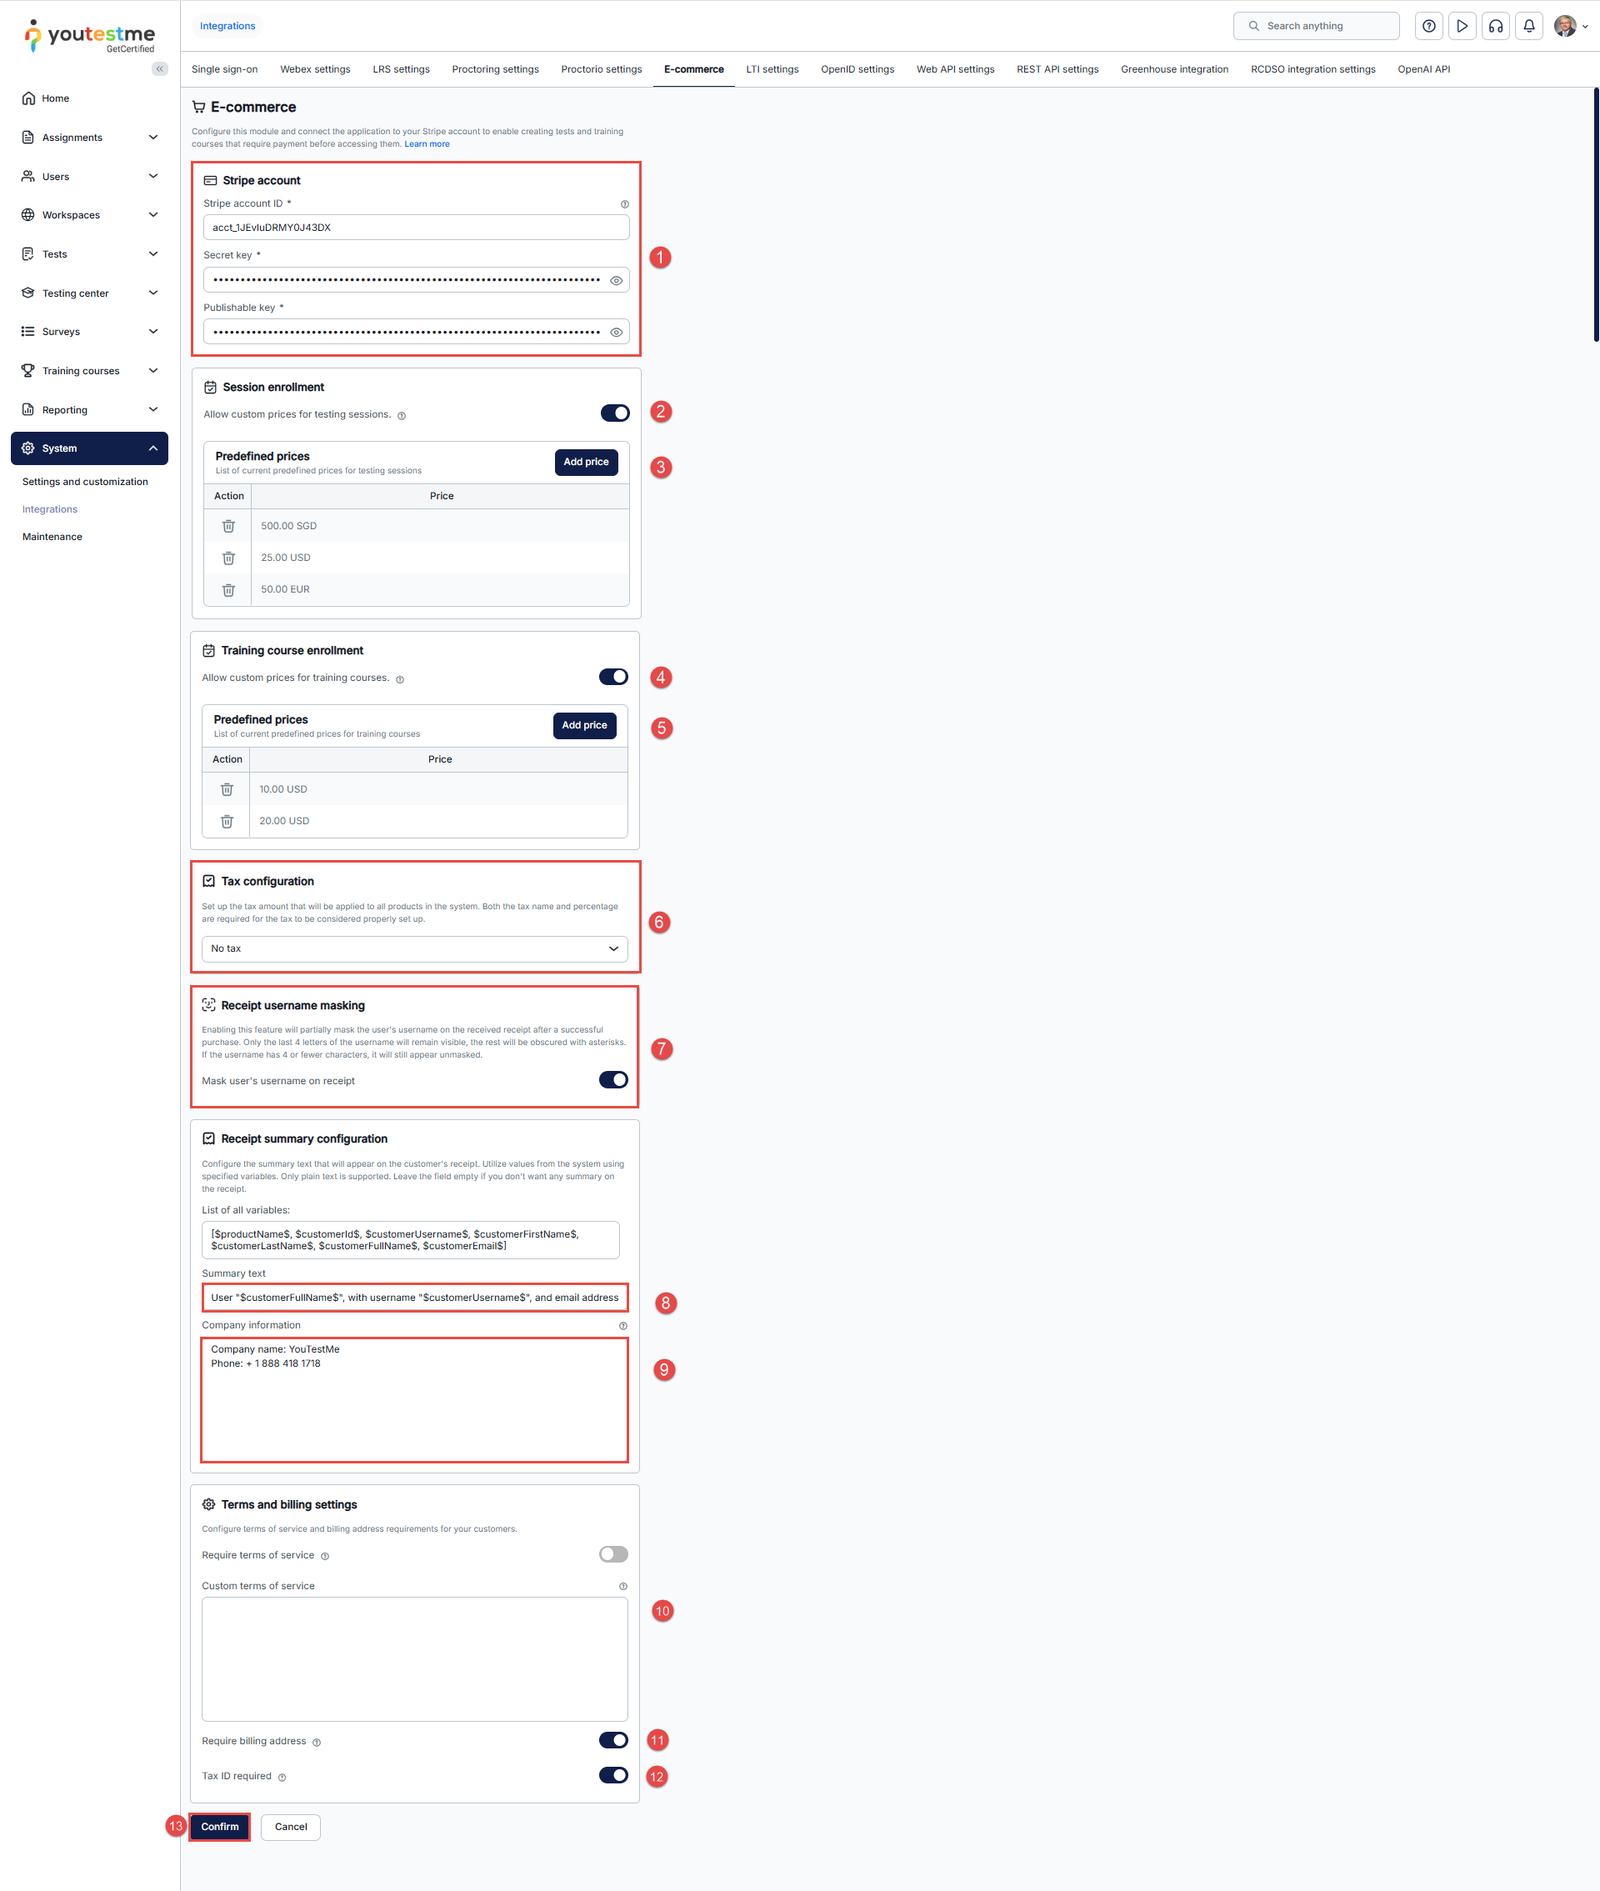
To integrate your YouTestMe GetCertified application with E-commerce, navigate to System, select Integrations, then navigate to the E-Commerce tab:
- Integrate with your Stripe account – enter the Stripe account ID, Secret key, and Publishable key.
- Enable the Allow Custom Prices for Testing Sessions option.
- Add predefined prices for testing sessions using the Add Price button.
- Add predefined prices for training courses using the Add Price button.
- Tax Configuration – For more information, refer to this article.
- Enable the Mask user’s username on receipts to hide the user’s username on the generated receipt – for more information, refer to this article.
- Add receipt summary configuration – for more information, check this article.
- Enter your full company information in the provided multiline text box. This information (e.g., company name, address, phone number, VAT number) will appear below the YTM logo on the receipt.
- Enable the ‘Require Terms of Service’ option to prompt users to accept your terms before they proceed to checkout.
Enter your Terms of Service text using Markdown (e.g.,[Terms and Service](https://your-terms-service-link)). - Require Billing Address: When enabled, customers must enter their billing address during checkout.
Note: If Dynamic Tax is enabled, the billing address will be required regardless of this setting. - Require Tax ID: When enabled, customers must provide their Tax ID.
Note: Tax ID collection is only available for countries supported by Stripe. Refer to the Supported Tax ID Countries list for more information. - Confirm the changes by clicking the Confirm button.
How to test integration with YouTestMe GetCertified
Once you’ve connected your account with YouTestMe GetCertified, you can simulate payments to test this integration using Stripe’s Test mode.
Pre-requirements:
- A Training course or a Testing Session with fees created in YouTestMe GetCertified
- At least one candidate is assigned to the particular training course.
- Test mode is enabled on your Stripe account.
To activate Test mode:
- Go to Stripe’s API Keys page (Test mode).
- Copy the Publishable key and Secret key back to YouTestMe GetCertified.
- Choose one of Stripe’s testing cards.
- Access the YouTestMe GetCertified as a student and find your dummy training course with E-commerce.
How to Identify All Candidates Who Purchased a Testing Session
For more information, check this article.
For more useful instructional materials, please visit: